Page 1 of 3
Ed's pond build
Posted: Mon Aug 09, 2010 4:48 pm
by eds
Here are the photos to start the thread off my pond build.
The plans are on this thread (
New pond design), but I've had to change them now I have more accurate measurements of the garden and will post those later.
First the before pictures.
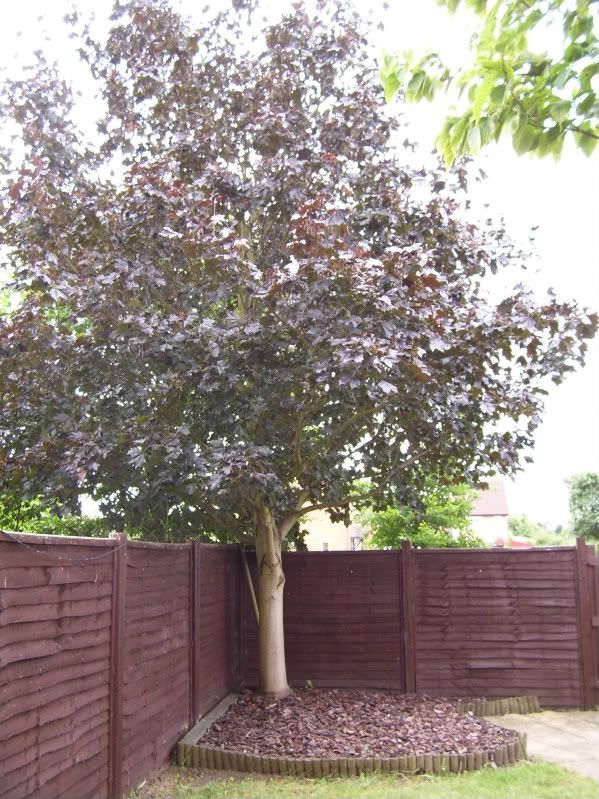
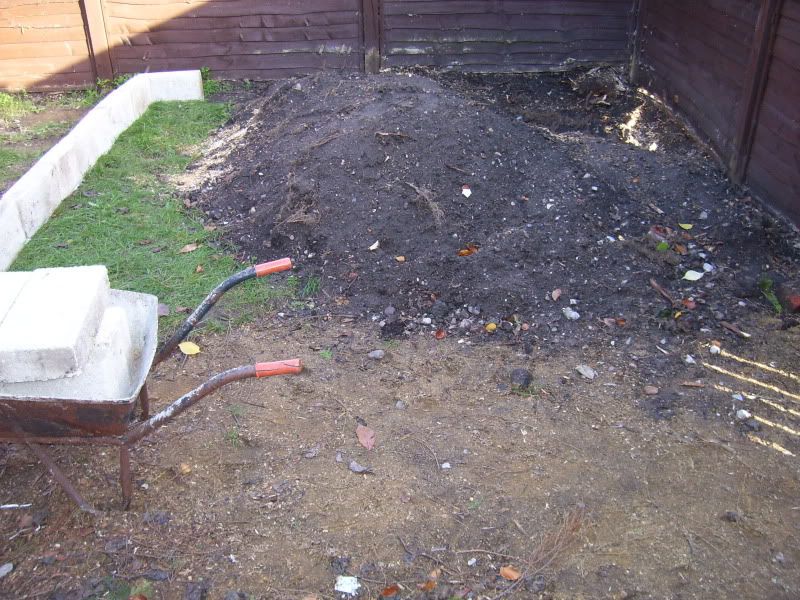
Looking down the garden,
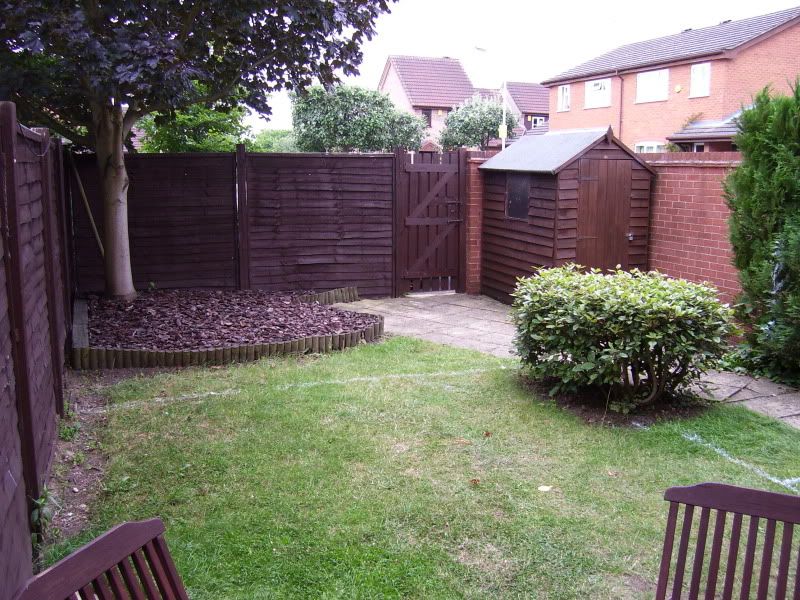
If you look on this photo you can see a white line going right across the garden. This is where the wall of the pond will be. The existing brick section of the wall is where the filter house will be sited and the rest will be pond! It's going to be around 4.8m long by 3.8m wide! Not too bad a size for a small garden!
The white line to the side is where the front of the greenhouse will go. See the photo below for a better look.
Looking back up towards the house,
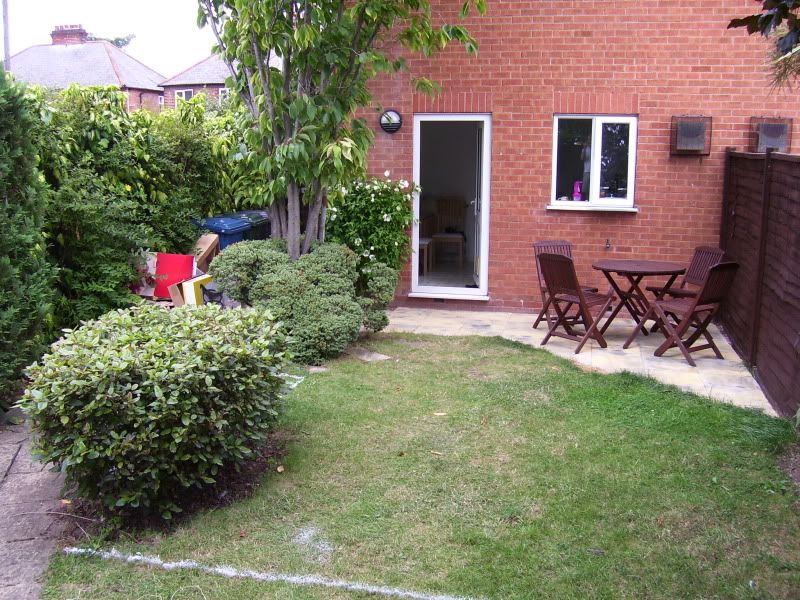
Where the greenhouse will go,
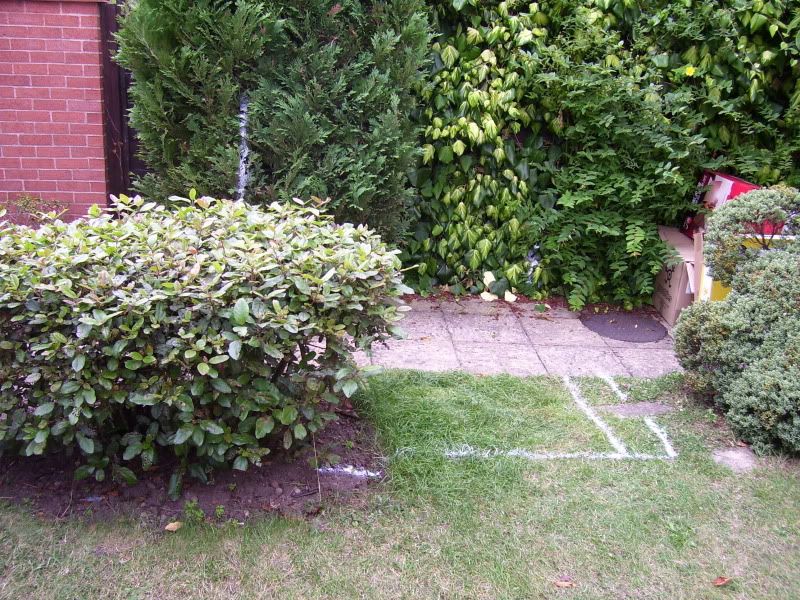
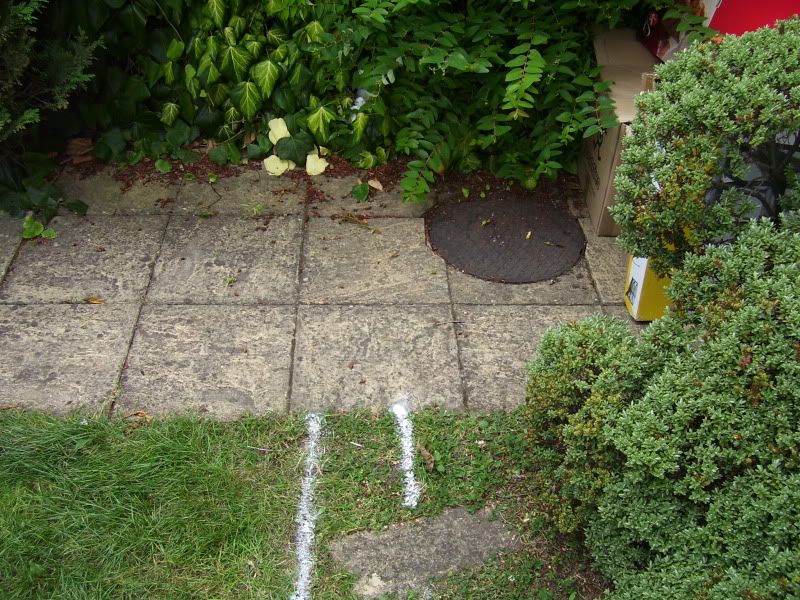
I wanted to site the greenhouse the other way round but there's a manhole cover (see picture below) that means I can't. So it will have to stick out further into the garden. Not too happy about it but there you go! No other place to site it really.
The manhole that's in the way of where I was going to site the greenhouse!
And a beautiful copper sycamore that's unfortunately got to go too! (But it is really too big for the garden anyway)
Re: Ed's pond build
Posted: Mon Aug 09, 2010 5:39 pm
by Jon W
Hi Ed
I see what you mean about the manhole cover. Do you think it might be possible to dig around it and accept that the pond wouldn't be a perfect rectangle?
Cheers
Jon
Re: Ed's pond build
Posted: Mon Aug 09, 2010 6:15 pm
by eds
The problem is I will need access to it at some point I'm sure and so it can't really go in the greenhouse. It won't matter too much the greenhouse being the other way around, it'll only come 2ft further into the garden than it would have done, not too bad really.
Re: Ed's pond build
Posted: Thu Aug 12, 2010 4:02 pm
by Jon W
Hi Ed
Any further action?
Cheers
Jon
Re: Ed's pond build
Posted: Thu Aug 12, 2010 5:18 pm
by eds
Nope! Been too busy drinking and then doing some jobs today. Won't get anything done now until after the weekend which will the removal of the tree and then a mate has a friend with a digger and grab lorry so I'll be getting them to do the digging for me!!! So should be some progress next week.
Re: Ed's pond build
Posted: Mon Aug 16, 2010 10:19 pm
by eds
Well at the Koi UK open weekend we did a fair bit of mulling over my plans, aided by large amounts of lager and guiness. So after picking the brains of Stuart, Mark (sushi), Maurice and Mike S the pond plans have been tweaked again.
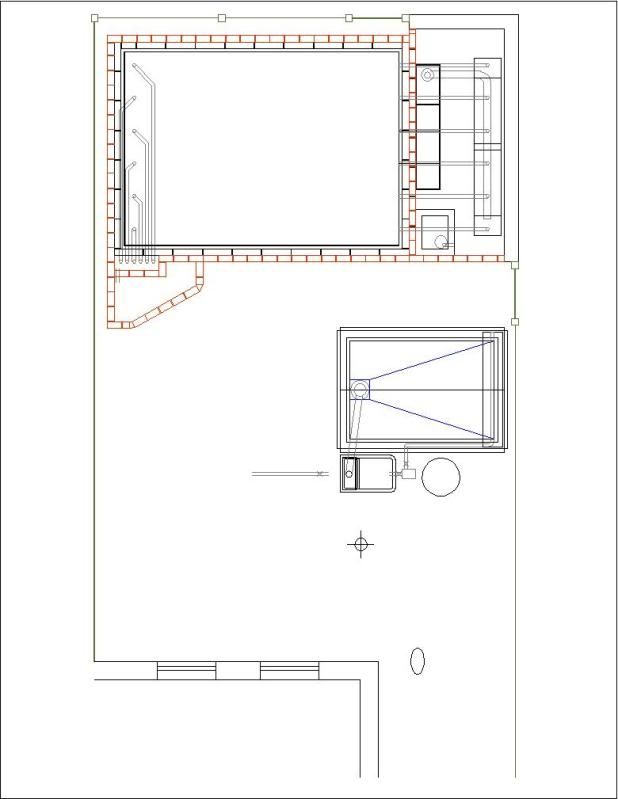
Here's the garden view,
And a new side view,
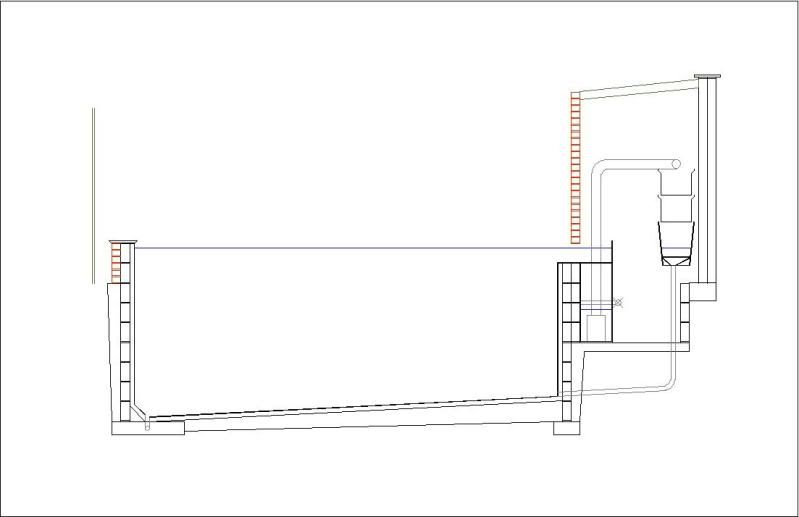
The pond is now shallower (2m at the deep end and 1.8m at the shallow end) as some people have had issues with deep ponds so I'm not taking any chances.
I have also switched the 4, 3" pipes for 6, 2" pipes. My/our thinking behind this was that 6, 2" pipes will create a bit more head in the bottom shower tray so more velocity coming out of the pipes at the pond base. It will also be dead easy (if the flow isn't strong enough) to stick a couple of ball valves on a couple of the lines and close them off so I have only 4, 2" pipes returning from the shower. If this still doesn't do the job I could even stick a couple of low wattage pumps from the sieve on these lines to increase the flow even more. I'm positive I won't need to but it gives me extra back up plans!
I have had it confirmed that the tree doesn't have a preservation order on it so hopefully I'll get rid of that this week and then look at getting the JCB and grab lorry sorted for the end of next week. I'm going to start digging the collar for the QT pond tomorrow and hopefully lay that later this week.
Re: Ed's pond build
Posted: Tue Feb 22, 2011 7:10 pm
by eds
Right, time for an update. Been a few changes to the plan for this. Due to time and cost factors I'm going for a box-welded liner construction rather than concrete and fibreglass so I can't really have the sloping bottom and air-lifts design. So it's a central aerated bottom drain and a skimmer feeding into a sieve with a pipe pump chucking the water over the shower. There will then be a 4" pipe return into the pond to create a circular current.
I did I start digging last year but the bad weather put pay to that until today.
Last year I laid the blocks out to show where everything would go and then started digging,
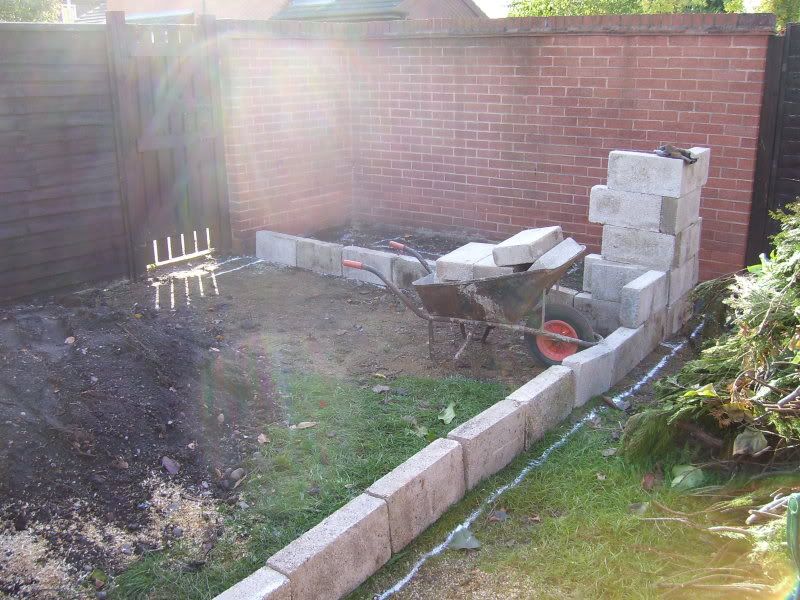
The filter house,

Where the tree used to be!
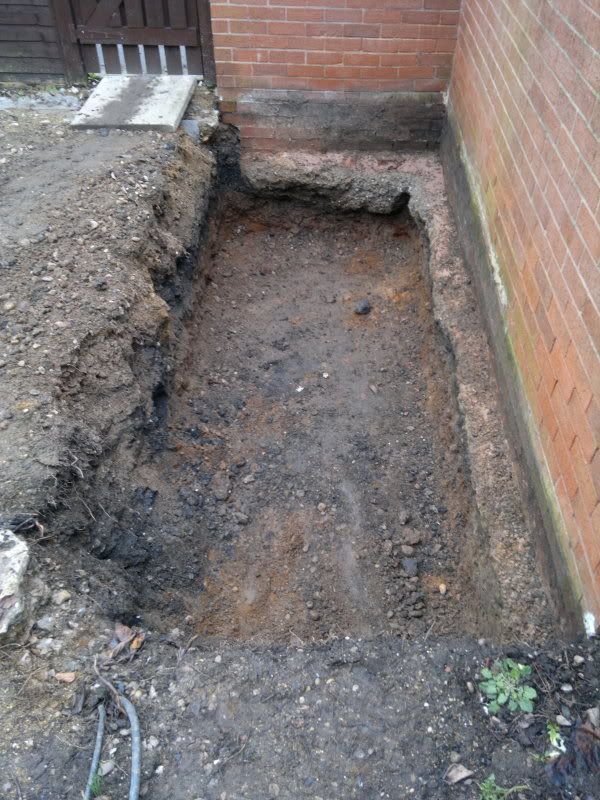
Today's progress.
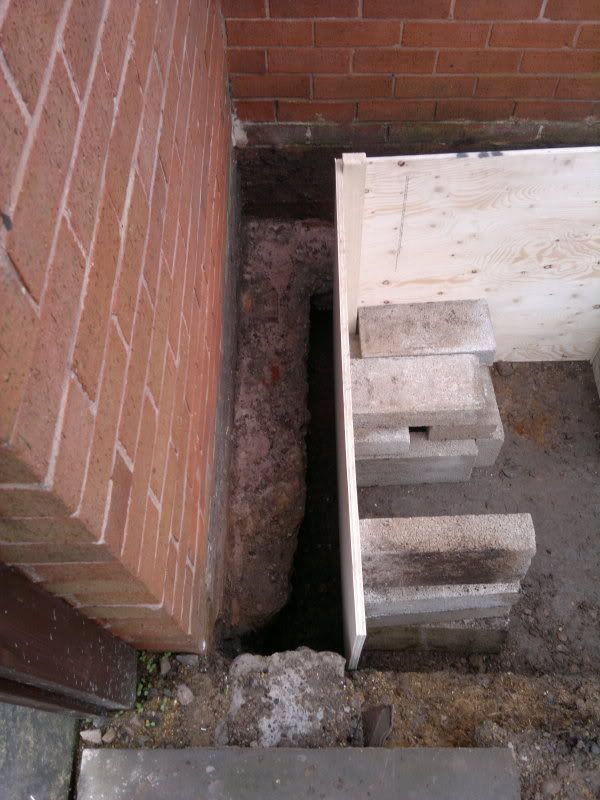
Before picture (well part-way through anyway),
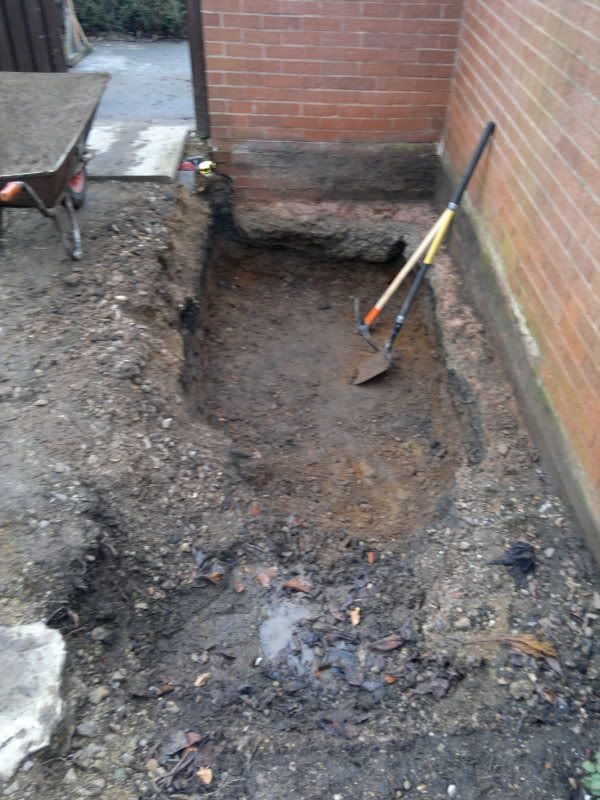
And where we finished today,
Tomorrow the plan is to finish off the last bit of digging, put shuttering up on the two sides where the wall is and pour concrete walls for these two sides of the filter pit. I'm then hoping to start laying blocks on Thursday and Friday to build the walls for the filter chamber.
Once the filter area's concrete base is laid then I am going to get a digger in to start digging the pond area. Unfortunately the ground is basically builder's rubble so hand digging is a non-starter! Wish I'd hired a bobcat to do the filter area!
Re: Ed's pond build
Posted: Tue Feb 22, 2011 9:00 pm
by Gazza
Well about time young man


Ed good luck with the build and lets hope you have some better weather on your side from now on to give you a good start to get it done so you can enjoy the summer
Just out of interest why a box welded liner as for some reason i thought they was very expensive when i looked for one on my first build

Is this going to run the same filtration or are there going to be some changes here also
Re: Ed's pond build
Posted: Tue Feb 22, 2011 10:03 pm
by eds
I got a quote for a box-welded liner last year for not much more than a normal one. One of the advantages of being a very simple shape i guess!
Filtration is basically the same but now a standard aerated drain and a converted skimmer will both feed into a sieve. From there a 33,000lph pipe pump will stop the water up to the shower and a 4" pipe will return the water back to the pond.
Re: Ed's pond build
Posted: Wed Feb 23, 2011 3:43 pm
by eds
Managed to get the concreting done by the wall today before the rain came!
Shuttering went in first,
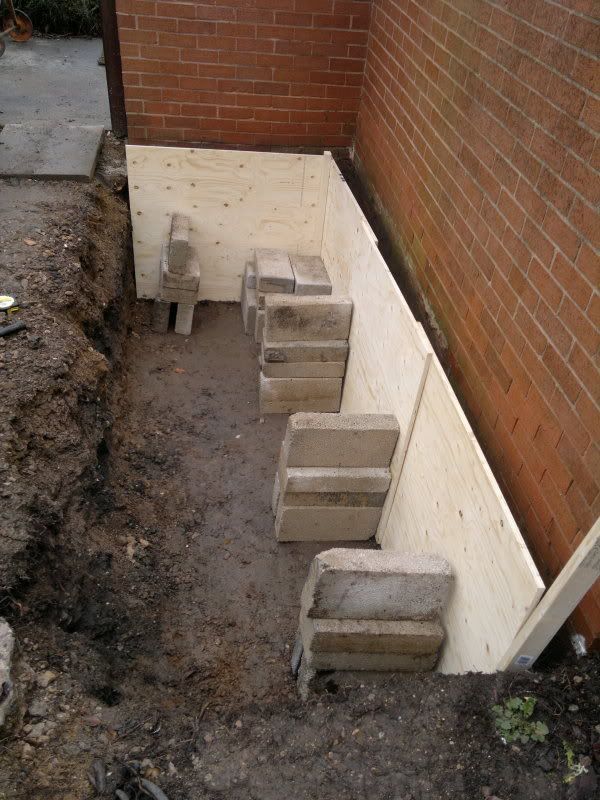
You can see the wall footings here that will completely enclosed in concrete to support them and give me a nice, neat finish.
Then the concrete went in,
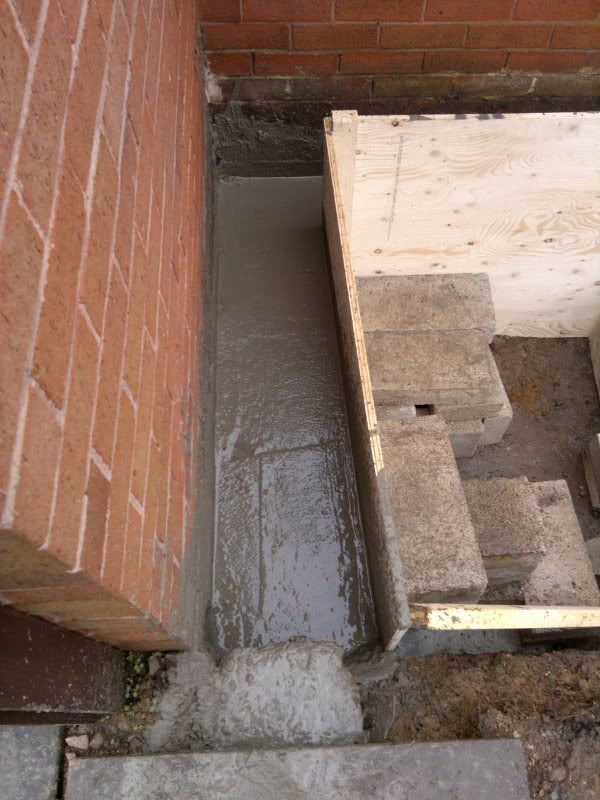
The eagle-eyed of you may have spotted the shuttering had moved so I needed some extra support,
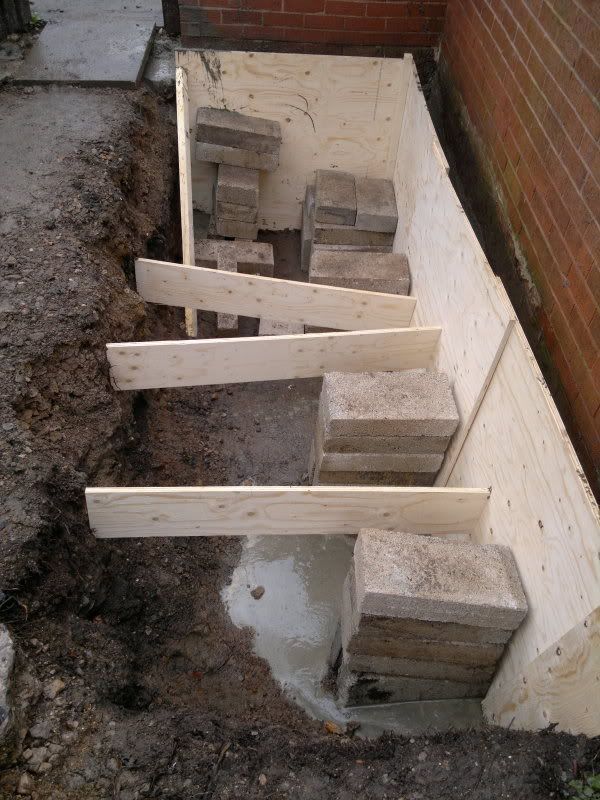
Always amazes me how much support shuttering needs and I always think I've over-done it and then need to add more! The concrete you can see in the base is some really watery stuff that leaked through!
Going to try and get the last bits of digging done in the filter are tomorrow and then lay some of the floor. The final floor won't be poured until after the bottom drain pipework is in place.
Re: Ed's pond build
Posted: Wed Feb 23, 2011 4:35 pm
by carlejo
Nice one, I like looking at pics of pond builds
Re: Ed's pond build
Posted: Wed Feb 23, 2011 5:09 pm
by Gazza
Hi Ed,
Great stuff mate and glad you got it done before the rain came
Hope the weather gets better from now on for the rest of the build mate.
Re: Ed's pond build
Posted: Wed Feb 23, 2011 7:56 pm
by Thorny
Dont worry to much about the shutter moving, You can strike shutter out tomorrow and with a float polish the lip away no problem, as the concrete will still be green. Why not fiber glass then ? is it just cost.
Justin
Re: Ed's pond build
Posted: Wed Feb 23, 2011 8:45 pm
by eds
Thorny wrote:Dont worry to much about the shutter moving, You can strike shutter out tomorrow and with a float polish the lip away no problem, as the concrete will still be green. Why not fiber glass then ? is it just cost.
Justin
Not worried about the shuttering moving; just annoying! The whole things moved though so taking a lip off wouldn't help much. As it is the line isn't critical for this part so no big deal.
Not fibreglassing for cost and speed. If i don't fibreglass then i don't need to lay a concrete floor or build blockwork walls under ground. I'll just line the hole with insulation and drop th liner in. If any walls don't look solid I'll render to stabilise them first.
Re: Ed's pond build
Posted: Wed Feb 23, 2011 8:53 pm
by Gazza
Hi Ed,
I take it your not going to be staying at this house to long