www.koi-unleashed.co.uk
ALL THINGS KOI AND H2O
Microscopy
Microscopes and how to use them
Duncan Griffiths
Duncan Griffiths Copyright © January, 2003, D, GRIFFITHS, ALL RIGHTS RESERVED
The aim of this article is to show
that ALL hobbyists are capable of using a microscope and how easy it can be.
What all the components do and how to adjust them, further, that microscopes
need not cost the earth to buy, last but not least the microscopic disease
of fishes is really quite fascinating. Although disease is not desirable and
we could all happily live with our koi without it occurring, the disease aspect
can be a part of the hobby that is just as enjoyable and interesting as the
viewing of a nice koi in pleasant surroundings
Microscope
types
The
most essential piece of equipment the koi owner will ever own for the diagnosis
of fish disease is the compound microscope. Even for those of you who have
access to an available friendly expert for your diagnosis, the purchase of
a microscope and learning how to use it and recognize disease; will be invaluable
to obtaining an early head start on a disease in your koi. The earlier you
can diagnose and treat a disease the much better the chance of recovery in
a sick koi.
Prices start from around £20/25 for a child's microscope
from a toyshop or child's educational center to highly specialized compound
microscopes costing thousands of pounds, to, electron microscopes costing
hundreds of thousands of pounds and every price you can think of in between.
I am going to assume no one reading this article has
access to an electron microscope so we will not be discussing those< big
smile>.
We *will* be discussing the basic light compound microscopes.
As mentioned microscopes are available for children in
toy and hobby/craft shops, these are not quite suitable for our purpose as
they do not have many of the features of the more professional microscopes
that enable finite detailing of parasites, but I will say this, if resources
are limited, they will work and you will be able to recognize some parasites
all be it in a limited way, it’s a case of any port in storm and one of these
is better than no microscope at all.
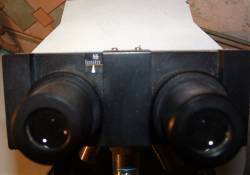
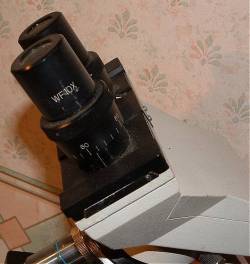
The types of microscopes available in this price range start at monocular
type {single eyepiece} to binocular types, twin eyepiece {twin binocular type
eyepieces}.
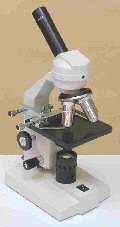
Monocular type

Binocular type
Also available
within these price ranges are stereo-type microscopes, but these tend to be
very low powered. You may just get away with this type for big parasites but
you would not detect the smaller types of organisms of which there are many.
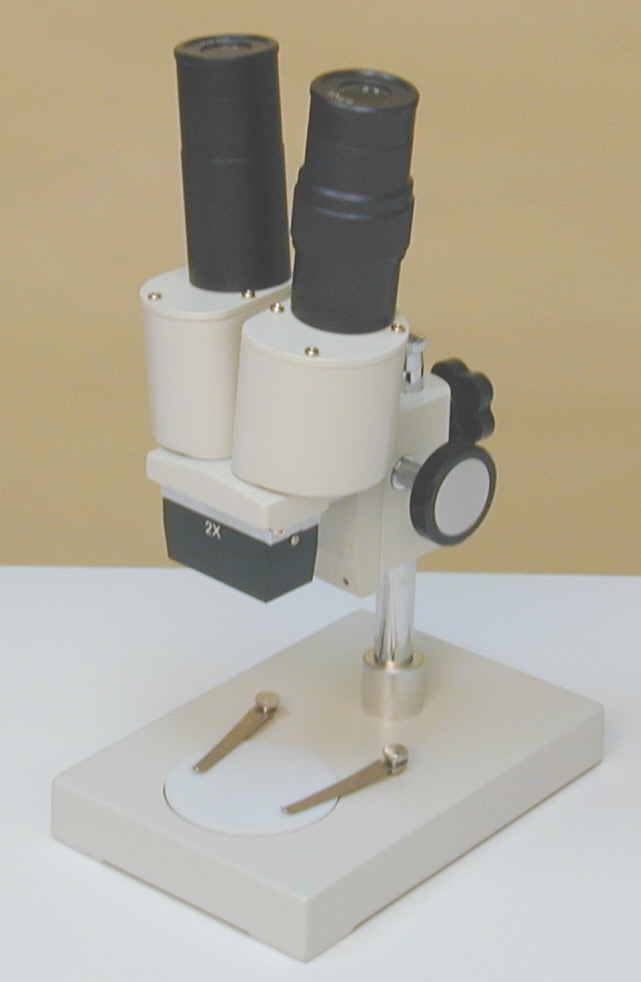
Stereo type microscope
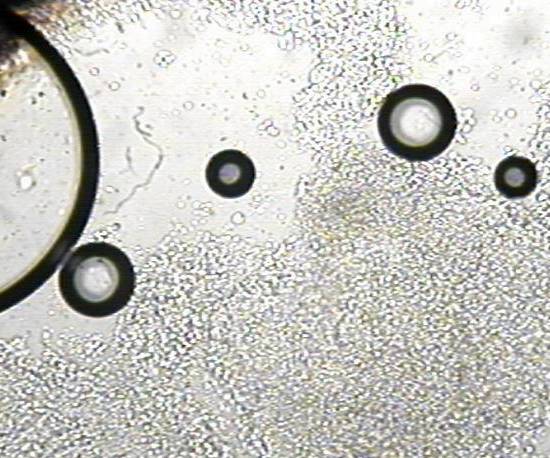
We
are looking for an instrument that has multiple magnifications from around
40X to 600X for most koi disease diagnosis, these can be obtained within the
price range quoted above. Most koi parasites can be seen easily at 100X-150X
magnifications
If you are prepared to spend a little more you can improve
on the quality of the optics on the scope, like all instruments using lenses
they improve and better results are obtained from better optic quality, but
all optics these days are pretty good for the purpose they were intended for.
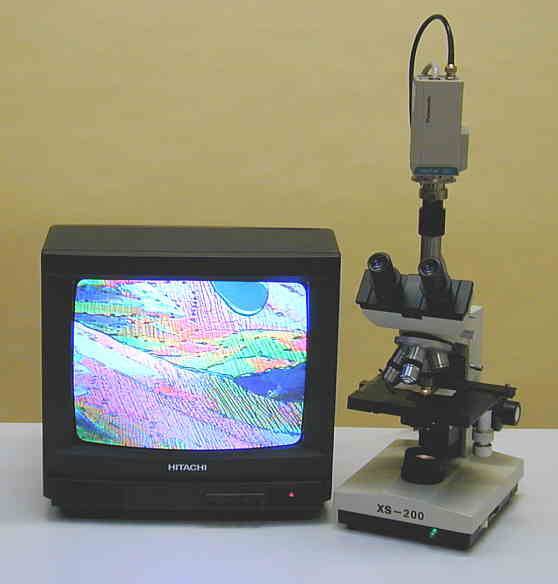
We can also move onto microscopes that are Trinocular format
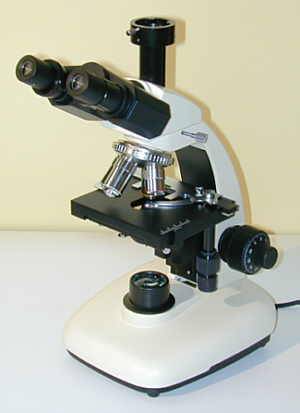

Trinocular
Trinocular with CCTV with SLR Camera
Question,
All these microscopes including the child's one all have something in common
what is it?
"They are all useless if you do not know how
they work or how to use them"!
Which leads me nicely to the next section
The Compound
Light Microscope
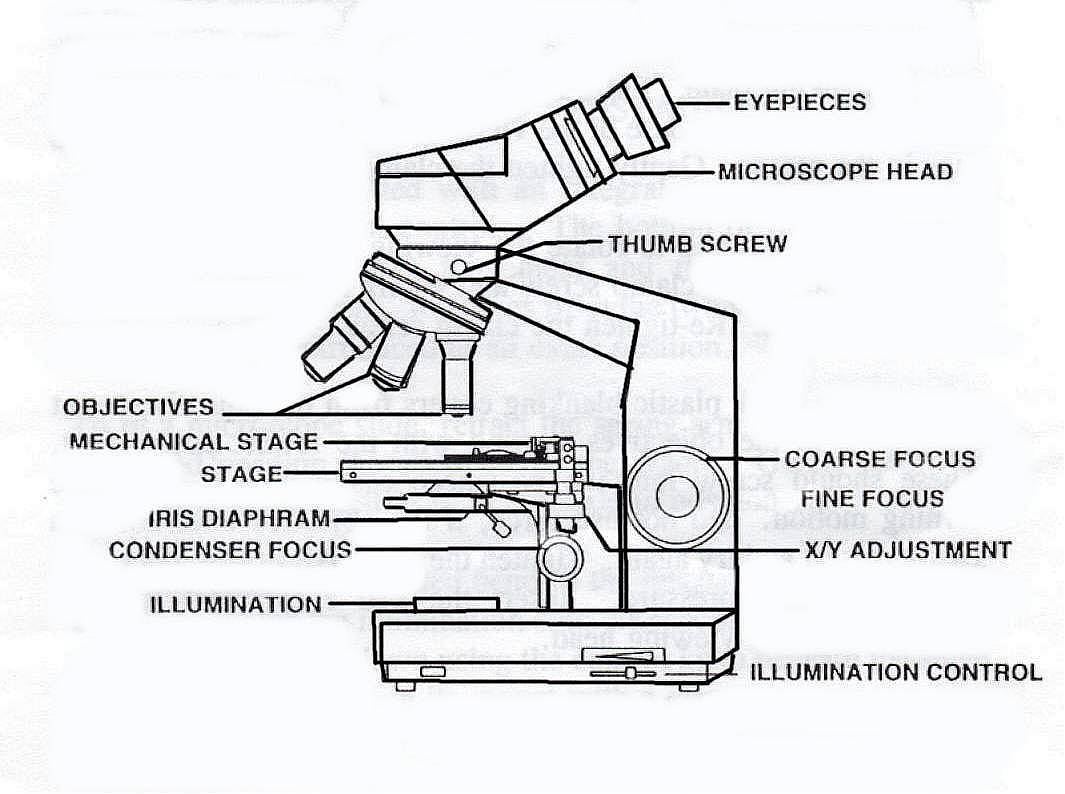
Starting
at the very top with the “Eyepiece”, these are optical viewing lenses that
vary in magnification most common is 10X, but they are available in anything
from around 5X to 20X. The more powerful 20X, unless they are of superb optical
quality should be avoided, as loss of image quality will be evident.
Eyepiece lenses are commonly available as wide field
eyepieces and as the name implies this type of eyepiece would give you a wider
field of view of the specimen.
Continuing down the microscope the next component that
is of importance to us, is the all-important objective lenses, usually referred
to as just "Objectives" and the revolving turret that holds them
stable and in place when viewing.
In normal circumstances four objectives are held in position
in the turret, although this can be three or even five. Typical objective
format is 4X,X10X, 40X or 60X and the last one is normally 100X combined with
a 10X eyepiece will give magnifications of 40X, 100X, 400X or 600X and 1000X,
The way in which we calculate what the total magnification of the image viewed
is, Factor the value of the eyepiece with the value of the objective, {by
multiplying the two values}. I.E. 10X Eyepiece value, multiplied by the
10X objective value = 100X, so the
image is being viewed at 100X {times} magnifications.
So to recap, multiply the Eyepiece value by the objective value to get the
overall magnification.
Dependent on which objective you think will give you
the necessary magnification, needed to view what you are expecting to see
under the microscope, you simply rotate the turret and position the appropriate
objective over the specimen.
The arrangement of the objectives in the turret is such
that as you rotate the turret you will move from the lowest magnification
and the smallest objective in size, to the next largest and so on, until the
highest magnification and longest objective is reached.
As far as the 100X objective is concerned, when used
in conjunction with the 10X eyepiece this will give a very powerful magnification/image
of 1000X, at these extreme magnifications all kinds of image contamination
occur from the atmosphere and light diffraction will degrade the image. All
100X objectives are called oil immersion lenses. With this process we add
a small drop of thin oil to the surface of the slide and submerge the lens
of the objective into the oil, thus eliminating the air from the space between
the slide and the lens, in so doing we reduce contamination and light loss,
this will result in a greatly improved image.
The oil immersion process is achieved, by focusing the 100X objective then
backing the objective away from the slide. We then drop a small sample of
oil on the area of the slide to be viewed, then very carefully bring the objective
back down, while watching that it does not touch down on the slide, {by viewing
from the side if needed} then apply fine focusing to get a sharp image.
An alternative way to do oil immersion is to, focus the
sample at 400X/600X, then rotate to 1000X, in this way when the turret and
objective is rotated to 1000X it should be in rough focus without striking
the slide, but, as you begin to rotate the turret round to the X100 objective
stop at the half way mark. Now while the cover slip is exposed drop some oil
on the slide, then continue to rotate round till the X100 locks into position
and fine focus.
Now was that hard?
Moving on down the microscope, we come to the stage,
this is simply a stage to hold the slide and specimen stable for viewing.
This can also be a moving stage that is capable of moving mechanically in
the X. Y. axis, thus, if your instrument is equipped with a moving sub-stage
you can systematically scan the slide leaving no area un-viewed. On entry-level
scopes they may not have this facility, so you will have to scan the slide
by manually moving the slide around between thumb and forefinger.
Moving down again, we come to the sub-stage condenser
and iris and filter holder
The condenser as the name implies condenses some thing.
That something is the light for viewing and illuminating the specimen.
The iris is used commonly for controlling the amount
of light reaching the subject in the image, but its true purpose is for controlling
the contrast of the image, the amount of light needed is determined by the
bulb and it's controls, and the iris is cut down or opened to obtain the best
contrast for image viewing.
Moving across the microscope, we come to the focus controls
both fine and course adjustment, these can be combined in one control, more
often than not they are two separate controls, again as the name implies one
is for course focus the other for fine.
Under the moving stage again we have the one of the most
important components the light source.
At entry level, microscopes may have a mirror, which
can be tilted to pick up light and deflect it into the condenser as we move
up in sophistication; the light source tends to be electric and as you move
up again, they will have a variable resistor to turn up or down the light.
Again if you want to get an entry-level microscope of
the mirror type, they do work. Just position a halogen desk spotlight in front
of the mirror and angle the mirror to deflect the light into the condenser.
Last but not least, the Foot or Platform. This may seem
like a very unimportant part but I can assure you nothing could be further
from the truth, if you need to view specimens at high magnification and want
them stable a heavy and broad foot is needed, I realize that a lot of microscopes
come with a horse shoe type arrangement, but by and large the more stable
the instrument the better the image and a substantial foot goes along way
towards that end.
We have now covered the main components of the microscope
now for some of the less common components
Microscope
head.
Some
of the high end instruments come with inclined viewing tubes for a more relaxed
viewing {see schematic picture} and certainly all the binocular/trinocular
types have this arrangement, so the head is separate from the tube body. In
the microscope head are prisms and/or mirrors to deflect the image from the
vertical through to the angle of the viewing tube, in making the head separate
this also enables the head to be rotated through 360O with out
loss of the image.

Interocular
adjustment is needed for binocular Microscopes so the eye pieces suit the
interpupillary distance between the eyes, this is done by pushing and pulling
the two eye pieces apart until the image looks like one complete round image,
with no hint of double vision specimens on view. Once this is achieved, the
reading on the optimum distance scale {usually above either the right or left
eye piece} must be taken, then this figure is transferred to each eye piece
tube {This is a knurled screw ring fitting located below the two eye pieces
with a scale drawn on in it white, this achieved by rotating the eyepiece
so that the reading around the circumference of each eye piece lines up with
a line etched on the outer part of the base of each eye tube
Interocular
Adjustment Dioptric Adjustment
Dioptric
Adjustment {binocular only}
Further
on binocular microscopes; there is also Dioptric adjustment, because with
this type of instrument you will be using two eyes instead of one, it maybe
the case that you wear spectacles, and your two eyes do not have the same
vision capabilities as each other, this feature compensates for that problem
The way adjustment is achieved in the event one eye is
impaired to the other.
When focus is achieved close the first eye and look with
the other eye through the other eye piece but now focus using just the Dioptric
adjuster ring by rotating the Dioptric ring till the image is in focus with
that eye, {note this time do not use the course or fine adjustment for this
part of the process} and that’s the job done, on the side of the Dioptric
ring is the measurement scale and a marker on the tube. Make a note of all
these settings and you can quickly dial in the correct settings for your eyes
if somebody else has used the microscope and altered the settings.
If both eyes are the same optically then both numbers will be *roughly* the
same on each eye piece, if the scales are different then you have an optical
difference from right to left eye
Generally, you will not need to view specimens through your microscope now
using spectacles if you wear them, as this finite eye adjustment on the instrument
has now compensated for your eyesight.
So
we have our microscope and some fish that need inspection for parasites, how
do we go about this for the first time?
Whenever
you are going to use your microscope it important to get everything prepared
first and get your-self comfortable.
Lay out a number of 3”x1” slides and cover slips, along
with a clean cloth, not only to clean and dry your hands but to wipe moisture
off the back of the newly prepared slide to prevent sticking of the slide
to the sub-stage. Further to this you will of course need a koi and a vat/bath
to apply a little anesthetic not to much, we are not looking to work on the
fish just subdue the koi to point where we can obtain a sample without having
to go and change afterwards, from splashing. {Note: some anesthetics expel
parasites off the host notably, “2-phenoxyethenol”} so be mindful of this.
So
how do we take and prepare a sample {know as a scrape and scope}
When
the koi is subdued, obtain a mucus sample by holding a flat plastic spatula
at a 45o angle to the body of the koi, then applying very slight
pressure run from the front of the koi; just rearward of the gill plate, along
the koi’s flank to the peduncle area {tail muscle) obtaining a small sample
of mucus. {If you have never done this before have a friend help to hold the
fish}

Having
obtained a mucus sample pick up a 3” glass slide then scrape the sample off
the spatula onto the glass slide, by rubbing the spatula face onto the edge
of the slide.
Now pick up a cover slip these can either be plastic
or glass and are normally 22mm square,
Now
the part its all been leading to!
Place
the sample; cover slip upper most onto the sub-stage and secure into the sub-stage
clamps, when satisfied all is secure its time to apply an objective to the
sample.
While observing the microscope from the side bring the
objective towards the slide and stop just prior to touch down. On most microscopes
there is a stop screw that prevents touch down on the slide, {a form of limiter}
it would be a good idea to set this now.
Place your eye to the eye piece and adjust the amount
of light for comfortable viewing and at the same time opening and closing
the iris, then rotating the course adjuster back the objective away from the
slide till an image appears in rough focus.
Now we can begin to systematically inspect the slide,
remembering to start at an edge moving up or down, it makes no difference
which way you start out as long as when you reach the end of the slide, you
traverse across the slide slightly then travel down or up the slide in the
opposite direction. Repeat this until the whole slide has systematically been
scanned.
If you discover nothing on the sample you can move to
either another slide/sample or move up in magnification to the next natural
selection.
To start with we will not use only the fine focus tuning
to obtain the sharpest image possible. But once this is set we can alter the
light to obtain adequate light for the specimen and finally close the iris
down to obtain good contrast for viewing the fine intricate detail of the
specimen.
If you have a digital or 35mmSLR camera, with the right adaptors photographs
can be taken now if you so wish.
I am hoping to cover photography in a later article.
So we have covered the basics, now you have no excuse
to not have a go.
If you require further information or advice don’t hesitate to contact me
further I can recommend a good contact man for microscope products and that
ever so important advice
Duncan